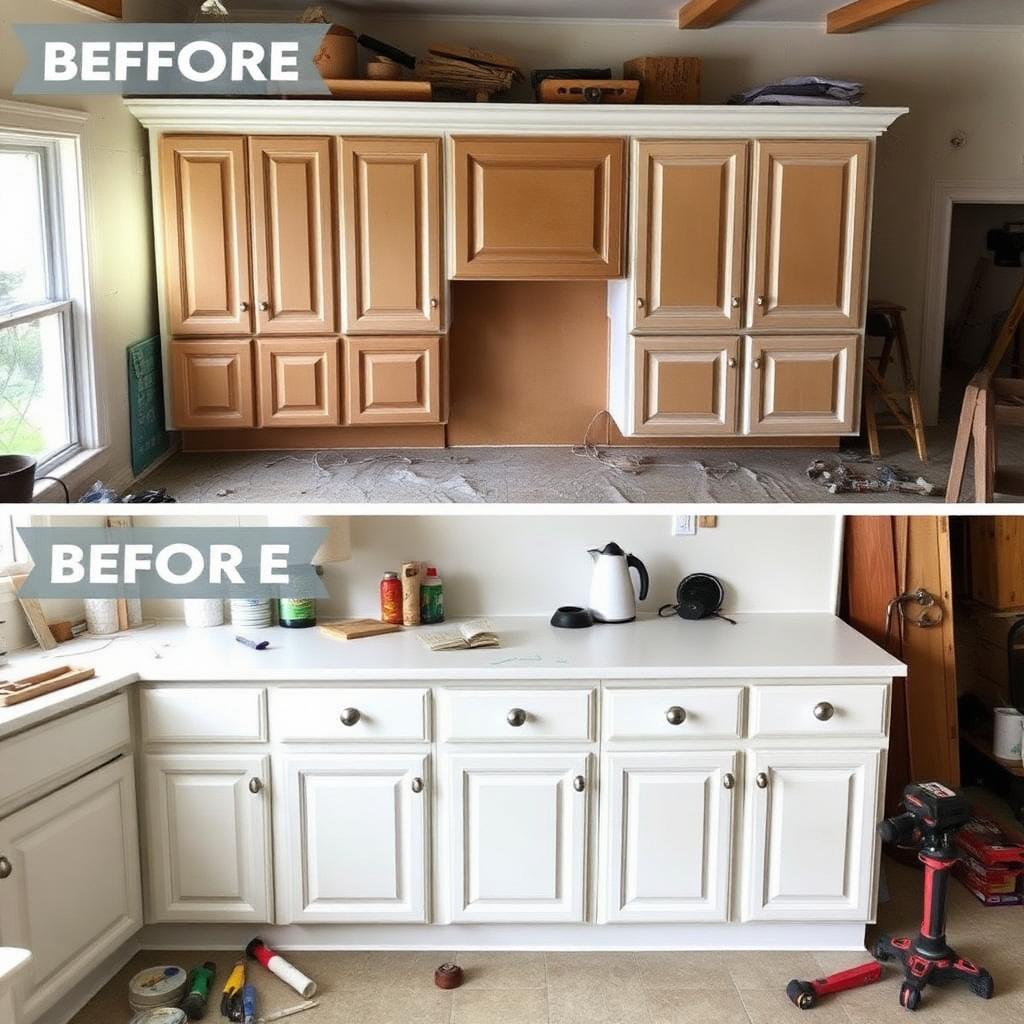
Have you been considering updating your kitchen but don't want to spend a fortune on a full remodel? Cabinet refacing is a cost-effective solution that can achieve a fresh new look without replacing cabinets entirely.
Painting Your Cabinets for a Fresh Look
A fresh coat of paint can immediately transform outdated cabinetry into modern and stylish storage solutions. Clean and prep the cabinet surfaces properly, prime beforehand, and use high-quality paint products for better coverage and durability.
Upgrading Your Hardware for a Modern Touch
Swapping out old or outdated fixtures for new hardware that matches your style can give your kitchen an instant refresh. Consider finishes like brushed nickel, satin brass, chrome, or matte black.
Choose sizes proportionate to your cabinetry for the best look.
Replacing Cabinet Doors
Replacing cabinet doors provides a complete transformation. Choose a style that complements your existing décor, experiment with colors and finishes, and don't overlook hardware updates to complete the look.
Update Your Kitchen Cabinets Today
Ready to update your kitchen with DIY cabinet refacing? Contact New Dawn Construction and Remodeling for expert advice on achieving professional results.
How to Reface Kitchen Cabinets with DIY Methods
A 6-step comprehensive guide to DIY cabinet refacing. Learn to properly clean and prepare surfaces, apply primer, paint cabinets professionally, install new hardware, replace doors, and reassemble for a complete kitchen transformation.
- Clean and Prepare Cabinet Surfaces Remove all cabinet doors, drawers, and hardware. Clean all surfaces thoroughly with strong degreaser to remove cooking oils and grime buildup. Rinse with clean water and let dry completely. Sand surfaces lightly with 150-grit sandpaper to roughen the finish for better paint adhesion. Wipe away all dust with tack cloth before proceeding.
- Apply Primer to All Surfaces Use high-quality primer specifically designed for kitchen cabinets. Apply thin, even coats using a brush or foam roller. Cover all surfaces including door fronts, backs, edges, and cabinet frames. Let primer dry completely according to manufacturer’s instructions (typically 2-4 hours). Light sanding between coats with 220-grit sandpaper creates ultra-smooth finish.
- Paint Cabinets with Quality Paint Choose durable cabinet paint in your desired color and finish (semi-gloss or satin recommended for kitchens). Apply first coat using high-quality brush or foam roller, working in thin, even strokes. Allow first coat to dry completely (4-6 hours). Apply second coat for full coverage and durability. Let paint cure for 48-72 hours before reassembling to ensure maximum hardness.
- Install New Cabinet Hardware Select modern hardware that complements your new cabinet color—consider brushed nickel, satin brass, chrome, or matte black finishes. Choose sizes proportionate to your cabinet doors and drawers. Measure and mark hardware placement carefully for consistent alignment. Drill pilot holes to prevent wood splitting, then install new knobs and pulls using appropriate screws. Ensure all hardware is tightened securely.
- Consider Replacing Cabinet Doors For more dramatic transformation, replace old cabinet doors entirely while keeping existing cabinet boxes. Measure all door openings accurately and order custom or stock doors that match your style. Choose door style (shaker, flat panel, raised panel) and finish that complements your kitchen décor. Install new doors with proper hinges, ensuring smooth operation and consistent reveals. This option provides complete transformation at moderate cost.
- Reassemble and Add Finishing Touches Once paint is fully cured, carefully reinstall all cabinet doors and drawers. Adjust hinges for proper alignment and smooth closing. Install drawer slides and test operation. Clean all surfaces with gentle cleaner. Add optional upgrades like under-cabinet lighting, shelf liners, or organizers. Step back and admire your professionally refaced kitchen achieved through DIY effort.